Installer un µcontroller F210A
Publié le 28/02/2015
Extrait du document
«
Zavio F210A Quick Installation Guide
Please follow the installation steps below to set up your F210A IP Camera.
Check the package contents against the list below.
See P.1
Physical overview.
See P.1
Install the hardware and connect all cables.
See P.2
Microsoft OS: Use the software CD to install Intelligent IP Installer.
See P.2
Access the IP Camera using Intelligent IP Installer.
See P.2
Mac OS using Safari Browser.
See P.4
Change light environment setting.
See P.5
Change the Web Interface into your preferred language.
See P.5
Using IP Camera via Mobile Phone.
See P.5
Windows Live Messenger Setting.
See P.6
Access to Internet via Static IP, Dynamic IP or both.
See P.8
For more information, please check the User Manual available in the Software CD or you can download the latest
software from http://www.zavio.com
Package Contents
Camera F210A IP Camera
Quick Installation Guide Brief product information and quick installation
Software CD
IP Surveillance Software
Intelligent IP Installer
User Manuals
Language Packs
Mounting Bracket Three screws, Lock ring, Brace, and Base plate
Adaptor 5V DC, max 4.5W
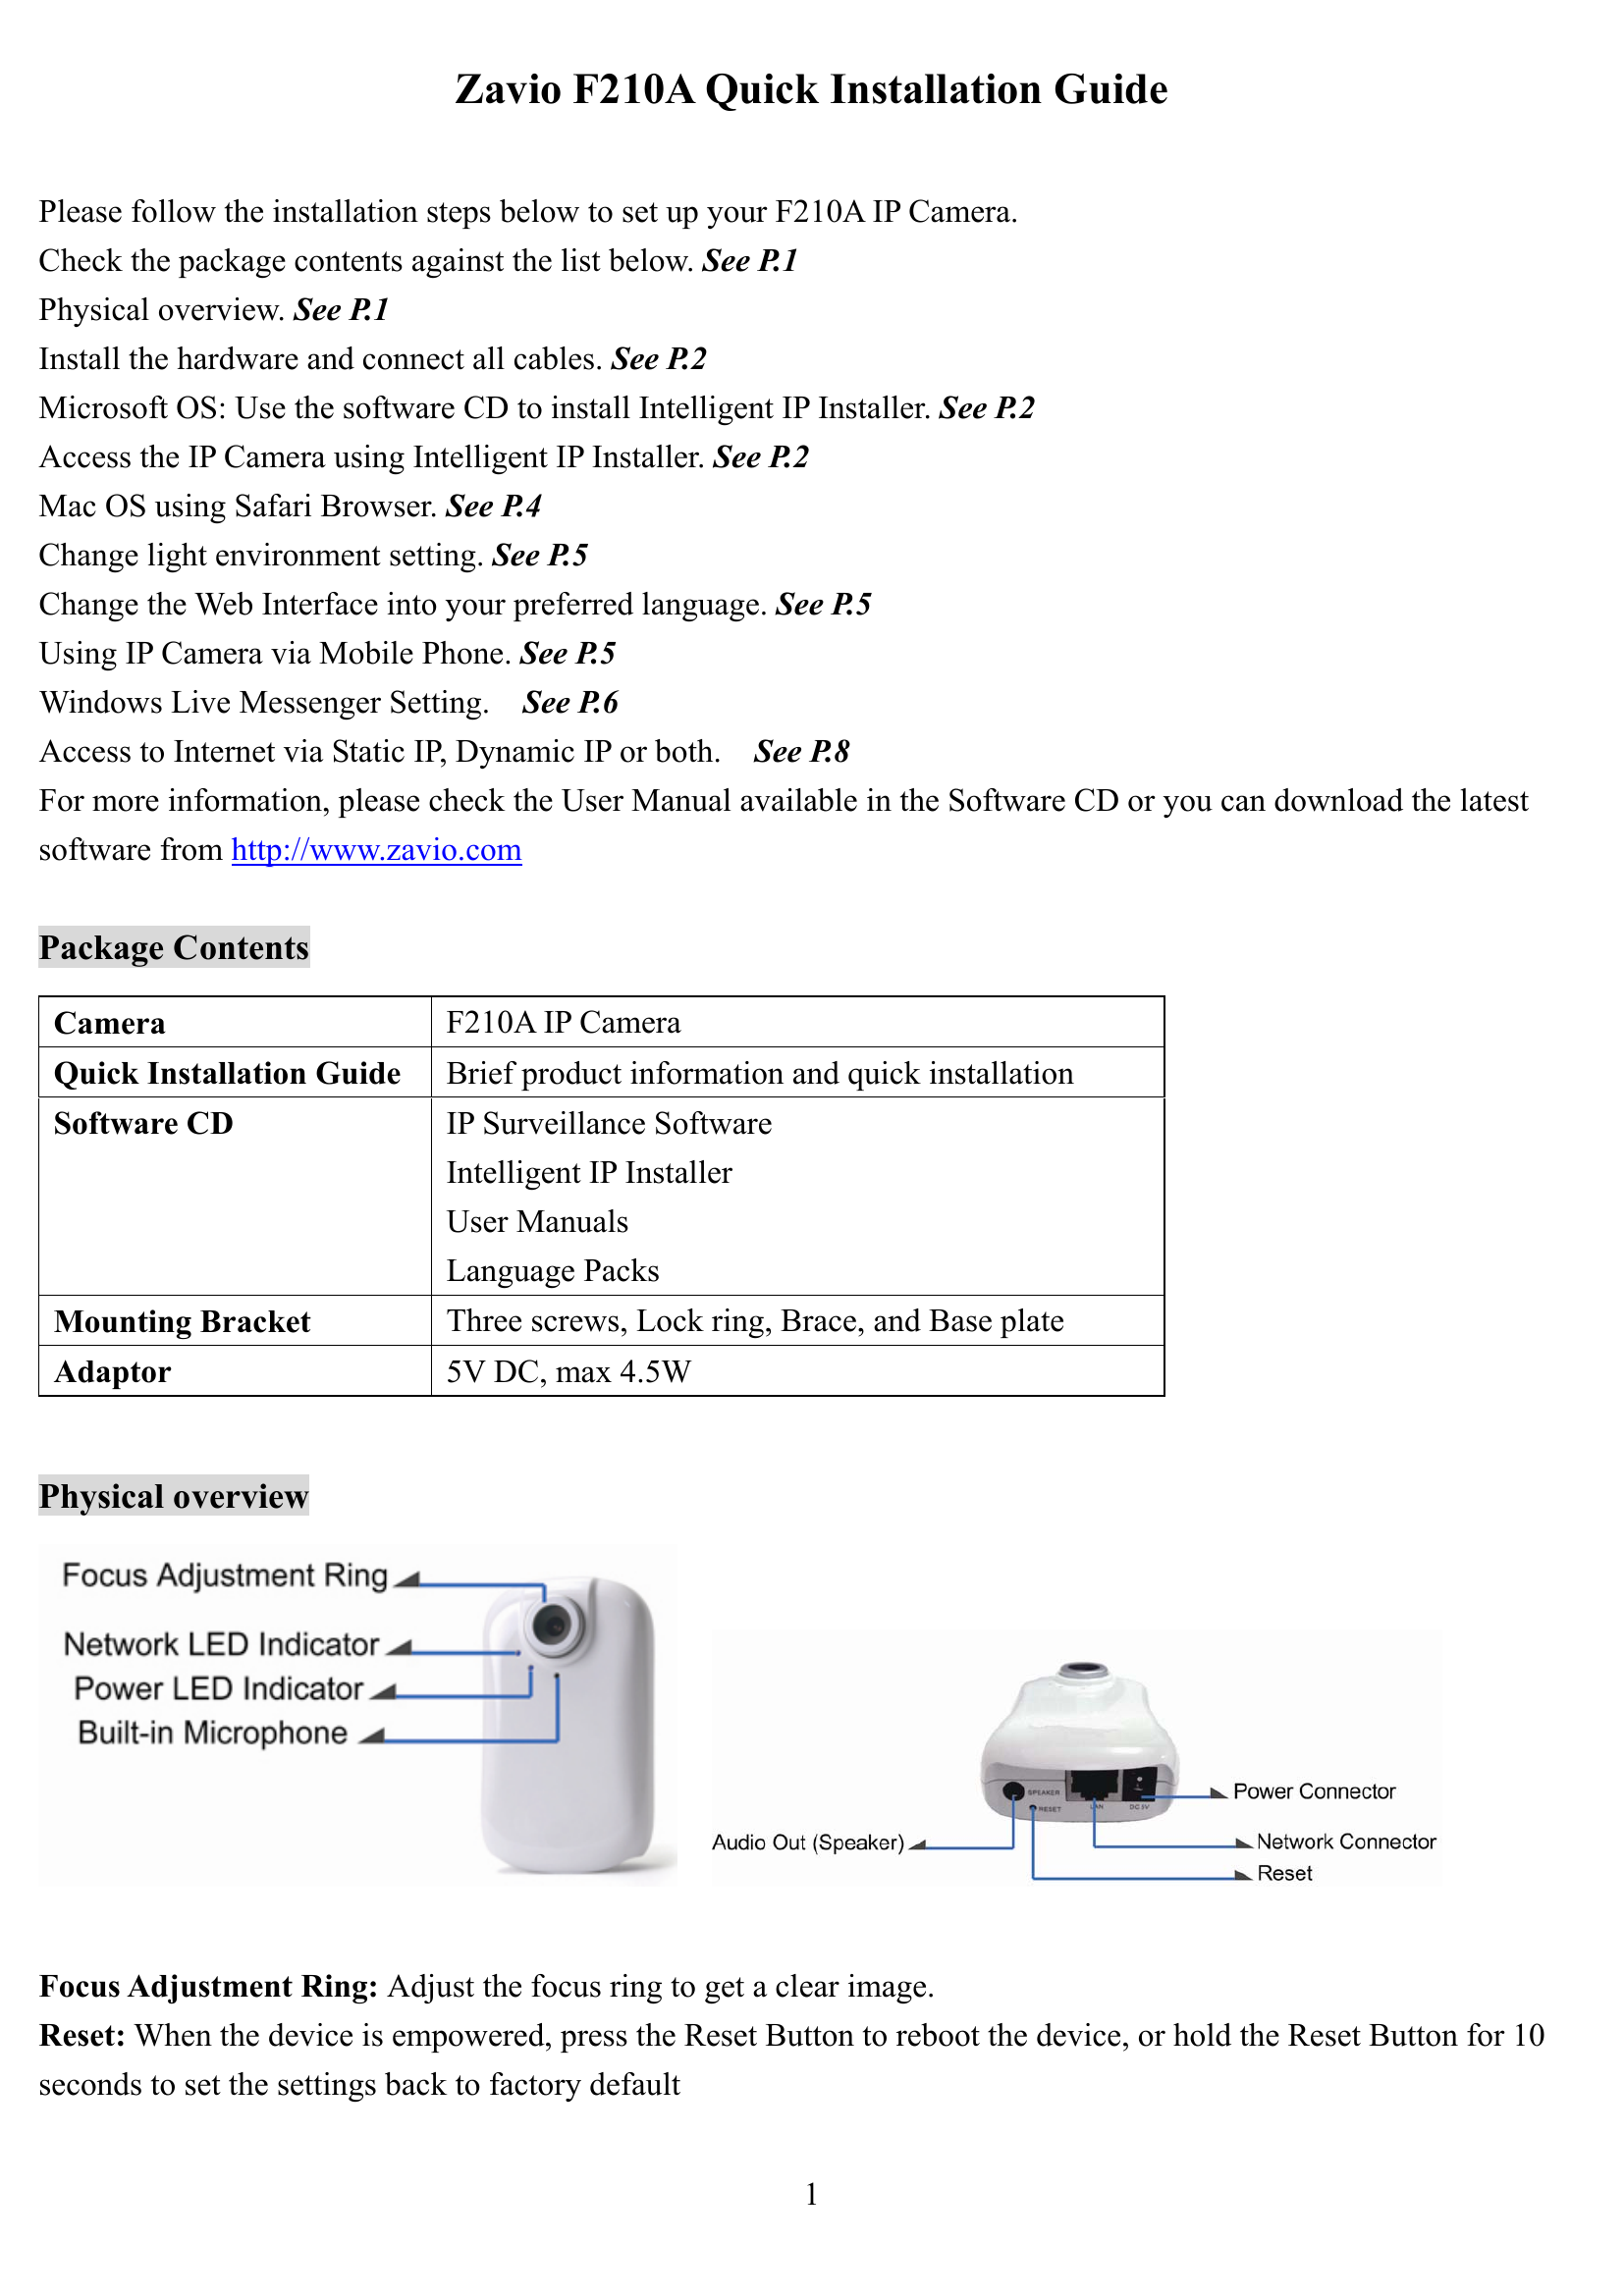
Physical overview
Focus Adjustment Ring: Adjust the focus ring to get a clear image.
Reset: When the device is empowered, press the Reset Button to reboot the device, or hold the Reset Button for 10
seconds to set the settings back to factory default
1.
»
↓↓↓ APERÇU DU DOCUMENT ↓↓↓
Liens utiles
- Jean COUSIN, dit le Père Vers 1490 - Sens 1560 - Paris Il était peintre-verrier à Sens avant de venir s'installer à Paris en 1540.
- François GIRARDON 1628 - Paris P l 5 - Paris Girardon apprit son métier de sculpteur dans l'atelier de François Anguier et panit quelque temps à Rome, d"où il revint pour s'installer à la Cour.
- Gertrude Stein C'est son frère Léo qui incita Gertrude Stein à s'installer à Paris.
- Antonio Fernandez par Marcel Griaule Professeur à la Sorbonne, Paris Dès le milieu du XVe siècle, les catholiques romains avaient pénétré en Abyssinie, mais c'est seulement au début du XVIIe siècle que les Jésuites purent s'installer solidement à la cour.
- Garrot à oeil d'or: Il aime à s'installer dans le trou abandonné du pic noir.


